

 'Recent Posts' widget or 'Popular Posts' widget is very essential widget
(or gadget) for blogger blog. This widget displays your blog popular
posts based upon some analytic result along with snippet, images etc
which are also optional. By default blogger provides some styles for
this widget but somehow these are obsolete and unprofessional. I have
written quite a few posts about customization of this widget. This post
is also one of those customization but a little different. Here i shall
show you how to display popular posts or recent posts in horizontal
manner instead of vertical. The main and only problem is that it
requires larger horizontal space i.e. larger width of of your blog. So
before you proceed, make sure you have enough room in your blog to
display posts horizontally.
'Recent Posts' widget or 'Popular Posts' widget is very essential widget
(or gadget) for blogger blog. This widget displays your blog popular
posts based upon some analytic result along with snippet, images etc
which are also optional. By default blogger provides some styles for
this widget but somehow these are obsolete and unprofessional. I have
written quite a few posts about customization of this widget. This post
is also one of those customization but a little different. Here i shall
show you how to display popular posts or recent posts in horizontal
manner instead of vertical. The main and only problem is that it
requires larger horizontal space i.e. larger width of of your blog. So
before you proceed, make sure you have enough room in your blog to
display posts horizontally.
- Features :
- Full control over 'Image thumbnail' view.
- Full control over 'Snippet' view.
- If you have checked 'Show image thumbnail' but unfortunately your blog post contains no image, then image thumbnail will be automatically filled by a preassigned image (no-image) as shown in the figure.

Before you make any changes in your blogger template, it is recommended to backup your blog in case something goes wrong.
It is just a cautionary statement. Don’t get scared. Just stay serious.
Let's proceed. It is just a cautionary statement. Don’t get scared. Just stay serious.
- Sign in to Blogger.
- Click the Drop-down arrow adjacent to 'Go to post list' icon.

- Click 'Layout' form the drop-down menu list. It will take you to the layout section of different widgets (or gadgets) of your blog.
- Click 'Add a Gadget' link as shown in the fig below. A new window will open that contains list of all gadgets available.

- Scroll down and when you see 'Popular Posts' gadget, click on it or click the '+' icon as shown in fig below.

- This will take you to a new window named as 'Configure Popular Posts'.
- Select the 'Most viewed' option to 'All time' .
- Select number of the post(s) in 'Display up to' section.
- Check 'image thumbnail' if you want to show it, otherwise leave it as unchecked.
- Check 'snippet' if you want to show some post texts along with its title.

- Hit 'Save' If your blog already contains this widget, you don't need to repeat the part that has been discussed so far.
- Click 'Template'
- Click 'Edit HTML'.

- Make sure that 'Expand Widget Templates' is checked. If you are using new interface of blogger, you don't have to do this part. 'Expand Widget Template' is checked by default in blogger new user interface.
- Search for (Ctrl+f) </b:skin and paste these codes before </b:skin
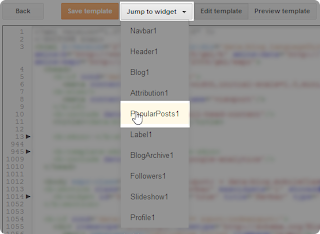
- Click on 'Jump to widget', select 'PopularPosts1' from the drop down
menu (if you are using blogger new interface) and find 'Show snippets
and thumbnails'. You can also search for 'Show snippets and thumbnails'
(applicable for both new and old interface)
- You will find a code something like that
- Replace that code with this code. I should remind you to backup your template before any further movement.
- Hit 'Save template'

/*--Horizontal Popular Post using CSS by Bloganalyzer --*/

.PopularPosts li{
display: inline;
list-style: none;
width: 200px;
height: 150px;
float: left;
text-align: justify;
background: #e4e4e4;
border: 1px solid #333333;
color: #11111;
margin: 5px;
padding: 5px;
line-height: 1.2em;
}
.PopularPosts .item-title{
text-align: left;
width: 200px;
font-size: 20px;
background: #afafaf;
padding: 5px;
border-bottom: 1px solid #868686;
border-right: 1px solid #868686;
margin-bottom: 5px;
}
.item-thumbnail img{
height: 80px;
width: 80px;
}

<!-- (4) Show snippets and thumbnails -->
  <div class='item-content'>
    <b:if cond='data:post.thumbnail'>
      <div class='item-thumbnail'>
        <a expr:href='data:post.href' target='_blank'>
          <img alt='' border='0' expr:height='data:thumbnailSize' expr:src='data:post.thumbnail' expr:width='data:thumbnailSize'/>
        </a>
      </div>
    </b:if>
    <div class='item-title'><a expr:href='data:post.href'><data:post.title/></a></div>
    <div class='item-snippet'><data:post.snippet/></div>
  </div>
<!-- (4) Show snippets and thumbnails -->
  <div class='item-content'>
    <div class='item-title'><a expr:href='data:post.href'><data:post.title/></a></div>
    <b:if cond='data:post.thumbnail'>
      <div class='item-thumbnail'>
        <a expr:href='data:post.href' target='_blank'>
          <img alt='' border='0' expr:height='data:thumbnailSize' expr:src='data:post.thumbnail' expr:width='data:thumbnailSize'/>
        </a>
      </div>
    <b:else/>
      <div class='item-thumbnail'>
        <img src='https://blogger.googleusercontent.com/img/b/R29vZ2xl/AVvXsEgK9L8P0WXpwjmObAUJU3ijNEXfhxUA9ysrGO9GyLnD85a5Zmn8UmoDPtqM1u4ce2CLwVo_KQb-_jZhFIYRAJnmniUs4ST9gTgSa6v3bUO1fFskhPjKfHpqFQBX7IN-8tgiZsyw_mE0gHs/s400/noimage.png'/>
      </div>
    </b:if>
    <div class='item-snippet'><data:post.snippet/></div>
  </div>


