Step 1:
First Add Default Popular Post Widget in your Blogger Layout.
Go to Blogger ---> Layout ---> Click Add a Gadget ---> then Add "Popular Post Widget".(If you already added this widget on your Blogger then skip this step)

Step 2:
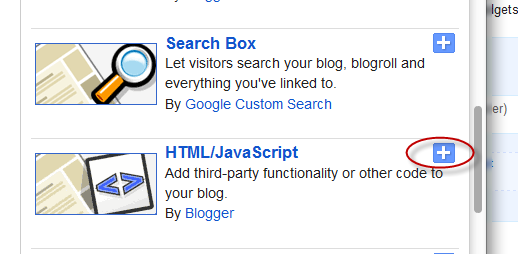
Add a "HTML/JavaScript" widget in your Blogger layout and insert below code inside "HTML/JavaScript" widget.
<style type="text/css" media="screen">
<!--
#PopularPosts1{
height:263px;
}
.item-content {
height:263px;
position:relative;
width:560px;
}
.slider {
height:263px;
margin-left:25px;
width:560px;
overflow:hidden;
margin-top:5px;
padding:0px 0px;
height:263px;
}
.item-snippet {
background:transparent url(http://i195.photobucket.com/albums/z105/dantearaujo/darkbg.png) repeat scroll 0 0;
color:#FFFFFF;
padding:5px 5px 10px 5px;
position:absolute;
bottom:0;
text-align:left;
width:560px;
font-size:9px;
font-style:italic;
}
.item-title{
color:#FFFFFF;
font-size:10px;
font-weight:bold;
font-style:normal;
margin-bottom:5px;
}
.item-title a:link,.item-title a:visited{
color:#FFFFFF;
text-decoration:none;
border:none !important;
padding:0 !important;
}
.item-thumbnail img{
padding:0 !important;
}
.item-thumbnail a{
padding:0 !important;
}
.crosscol .widget-content {position:relative;}
.slider ul, .slider li,
#slider2 ul, #slider2 li{
margin:0;
padding:0;
list-style:none;
}
#slider2{margin-top:1em;}
.slider li, #slider2 li{
width:560px;
height:263px;
overflow:hidden;
}
.item-thumbnail img{width:560px;height:263px}
#prevBtn, #nextBtn,
#slider1next, #slider1prev{
display:block;
width:30px;
height:77px;
position:absolute;
left:-30px;
text-indent:-9999px;
top:71px;
z-index:1000;
}
#nextBtn, #slider1next{
left:582px !important;
}
#prevBtn, #nextBtn, #slider1next, #slider1prev {
display:block;
height:77px;
left:0;
position:absolute;
top:100px;
width:30px;
z-index:1000;
}
#prevBtn a, #nextBtn a,
#slider1next a, #slider1prev a{
display:block;
position:relative;
width:30px;
height:77px;
background:url(http://i195.photobucket.com/albums/z105/dantearaujo/prev.png) no-repeat 0 0;
}
#nextBtn a, #slider1next a{
background:url(http://i195.photobucket.com/albums/z105/dantearaujo/next.png) no-repeat 0 0;
}
ol#controls{
margin:1em 0;
padding:0;
height:28px;
}
ol#controls li{
margin:0 10px 0 0;
padding:0;
float:left;
list-style:none;
height:28px;
line-height:28px;
}
ol#controls li a{
float:left;
height:28px;
line-height:28px;
border:1px solid #ccc;
background:#DAF3F8;
color:#555;
padding:0 10px;
text-decoration:none;
}
ol#controls li.current a{
background:#5DC9E1;
color:#fff;
}
ol#controls li a:focus, #prevBtn a:focus, #nextBtn a:focus{outline:none;}
.test{
margin:30px;
}


-->
</style>
<script src='http://ajax.googleapis.com/ajax/libs/jquery/1.6.1/jquery.min.js' type='text/javascript'></script>
<script src='http://accordion-for-blogger.googlecode.com/svn/trunk/easysliderpopular.js' type='text/javascript'></script>
Refer Screen-shot:

Arrange your "HTML/JavaScript" widget and "Popular Post" widget as mentioned in below scree-shot.

Result:

You'r Done!